
Welcome to my first blog post…ever! Whether you’re here because you’re sincerely interested in my content or here as moral support – thanks for stopping by. I am truly grateful! Now bear with me as I channel my 3rd grade “how to build a sandwich” essay-writing skills.
So…let’s talk painting cabinets shall we? This wasn’t my first DIY project in the new house, but I decided it’d be my first blog post because I get so many questions on how to do it. Here’s the first piece of advice I’ll give you before tackling cabinet painting – take your time . You can absolutely get a professional look for WAY less if you take each step of the process in stride and don’t flake on the prep work.
On a scale of 1-10:
- Level of difficulty: 3
- Level of patience required: 27
Ok, let’s dive in!
Supplies:
- Painter’s tape (to label your doors and cabinets)
- Degreaser
- Primer (I used Kilz)
- Behr Cabinet Enamel paint
- 220 sanding block
- Electric sander
- Paint roller and brush
- Paint sprayer
The cabinets I painted were in our laundry room. I felt confident taking a stab at these since it wasn’t a room most people frequented (let’s be honest, I try to avoid this room the most) and this was my first attempt at cabinet paining. I did lots of YouTubing in advance and after watching one or two videos, it’s essentially all the same. Clean. Sand. Prime. Paint. Here’s the before of our cabinets.
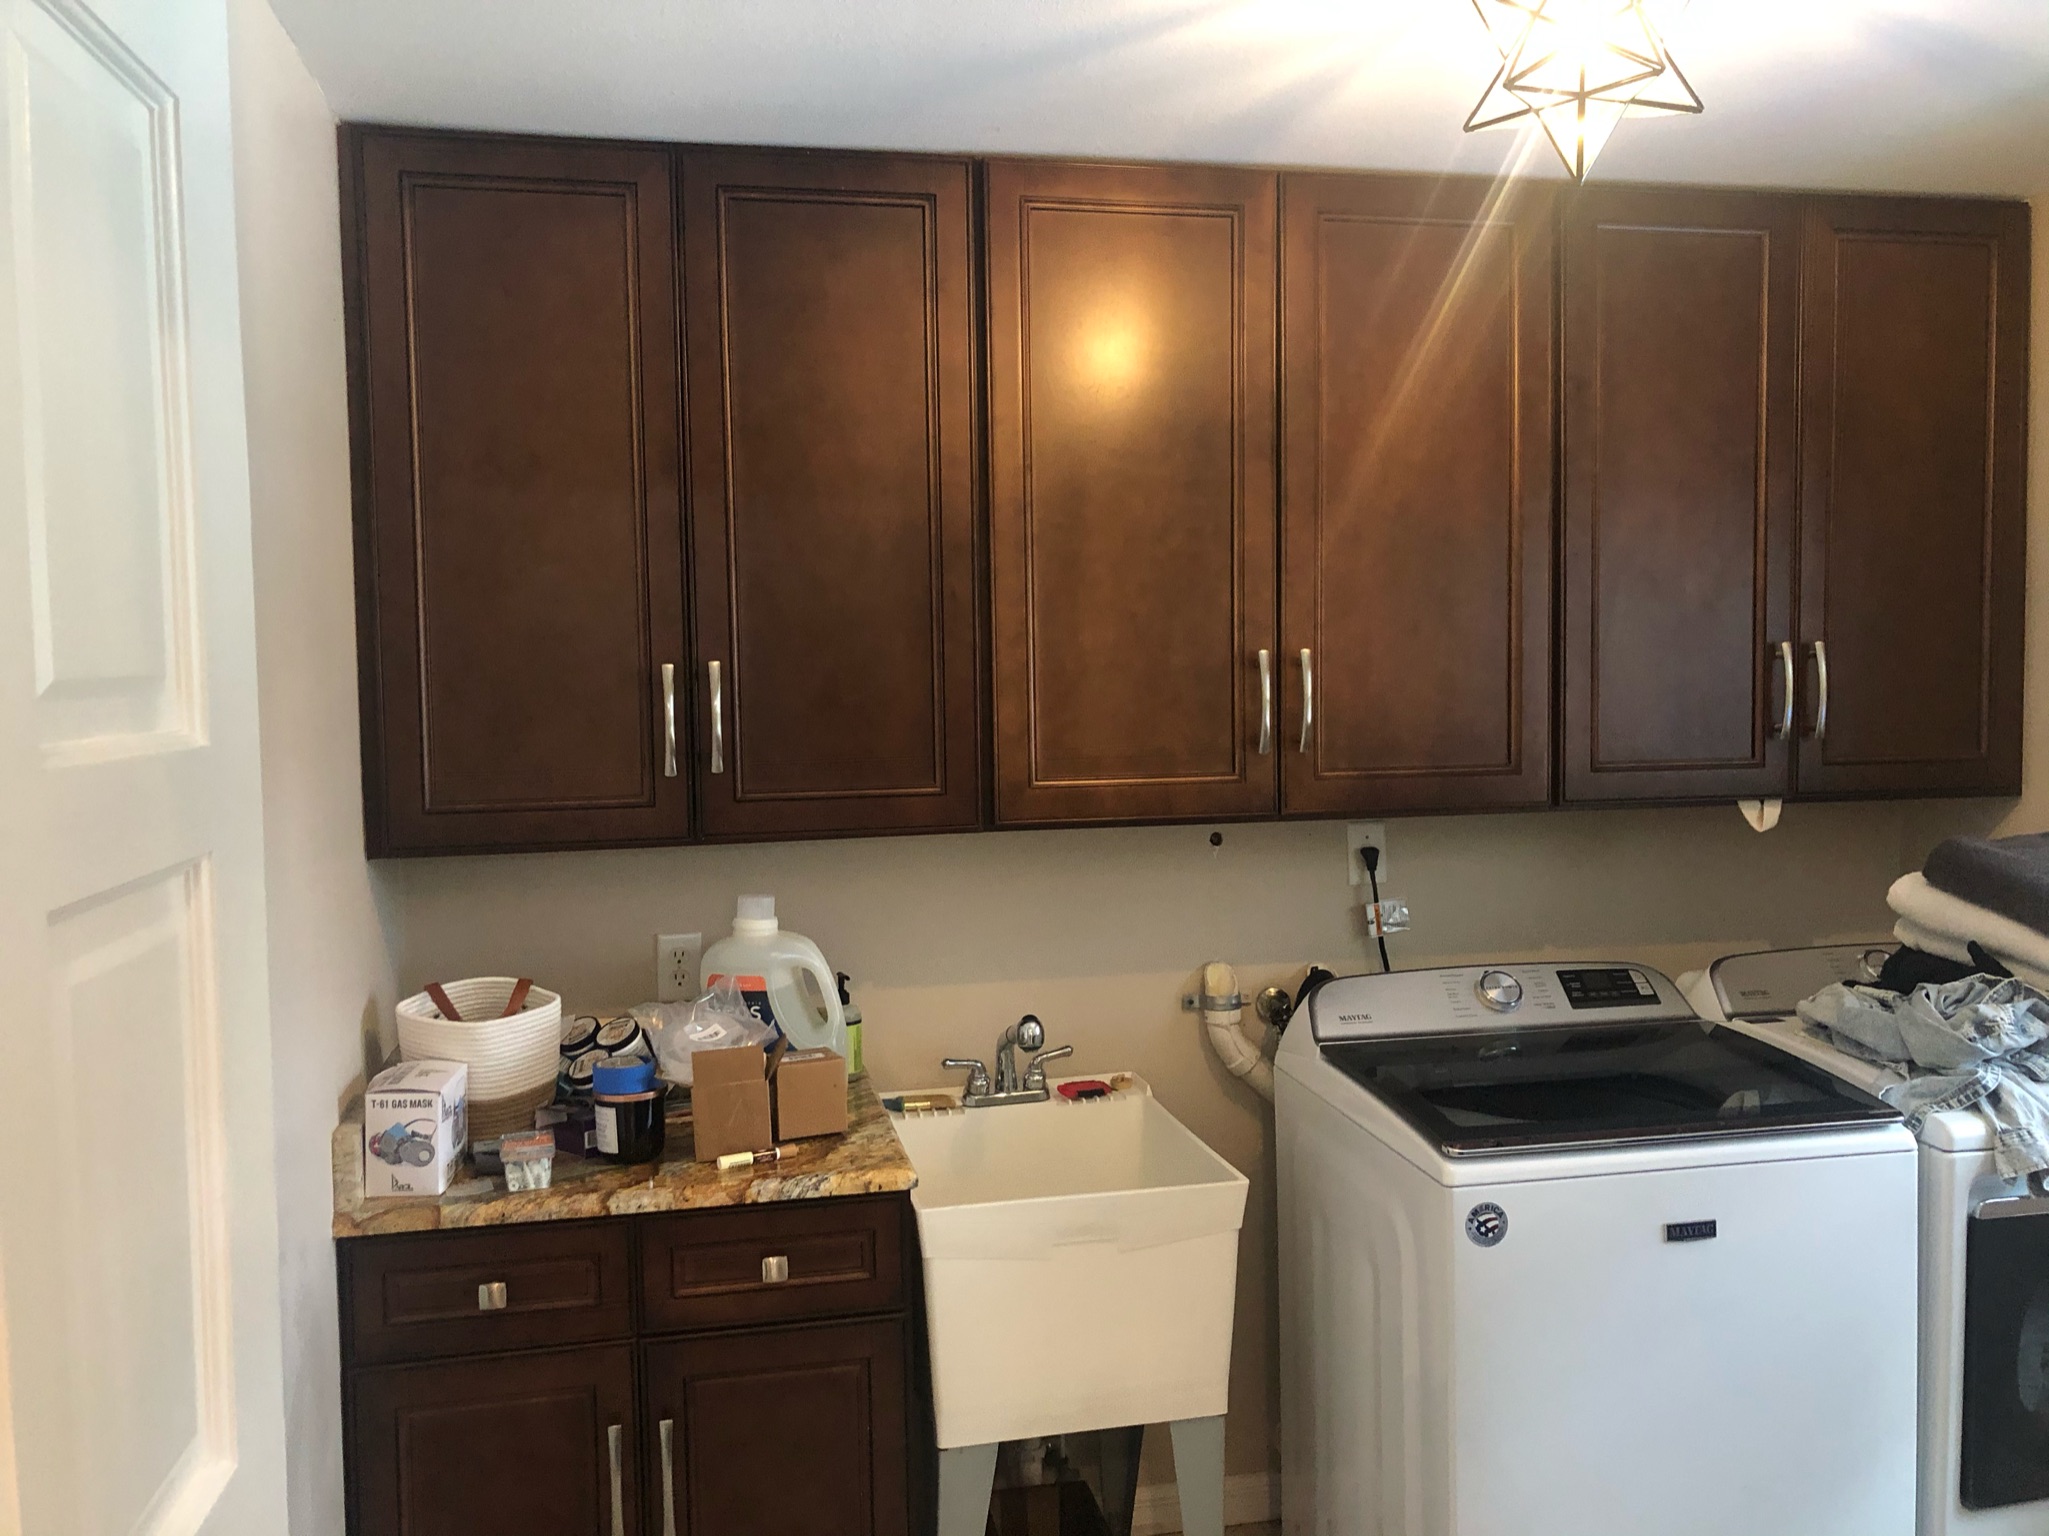
Objectively speaking, they were nice, quality cabinets. So great, in fact, that my father-in-law was mortified to hear that I was painting over our beautiful brown wood cabinets. Haha, you have to appreciate the sentiment. It’s a very traditional look. But I was going for something more modern, and light.
Now, before I dive into the specifics, let me just say that this is not a one-weekend project. Be prepared to work on this over the course of several days, maybe even weeks depending on how many cabinets you have. The major benefit of tackling this on your own is the cost savings (only hundreds of dollars compared to thousands). So keep that in mind as the days drag on – it’s worth the time investment!
Preparation
The first step is to label everything. There’s nothing more frustrating than getting through an entire cabinet painting project successfully only to realize you have no idea which cabinet doors go where in the end. TRUST. Use scotch tape to number each door and corresponding cabinet box.
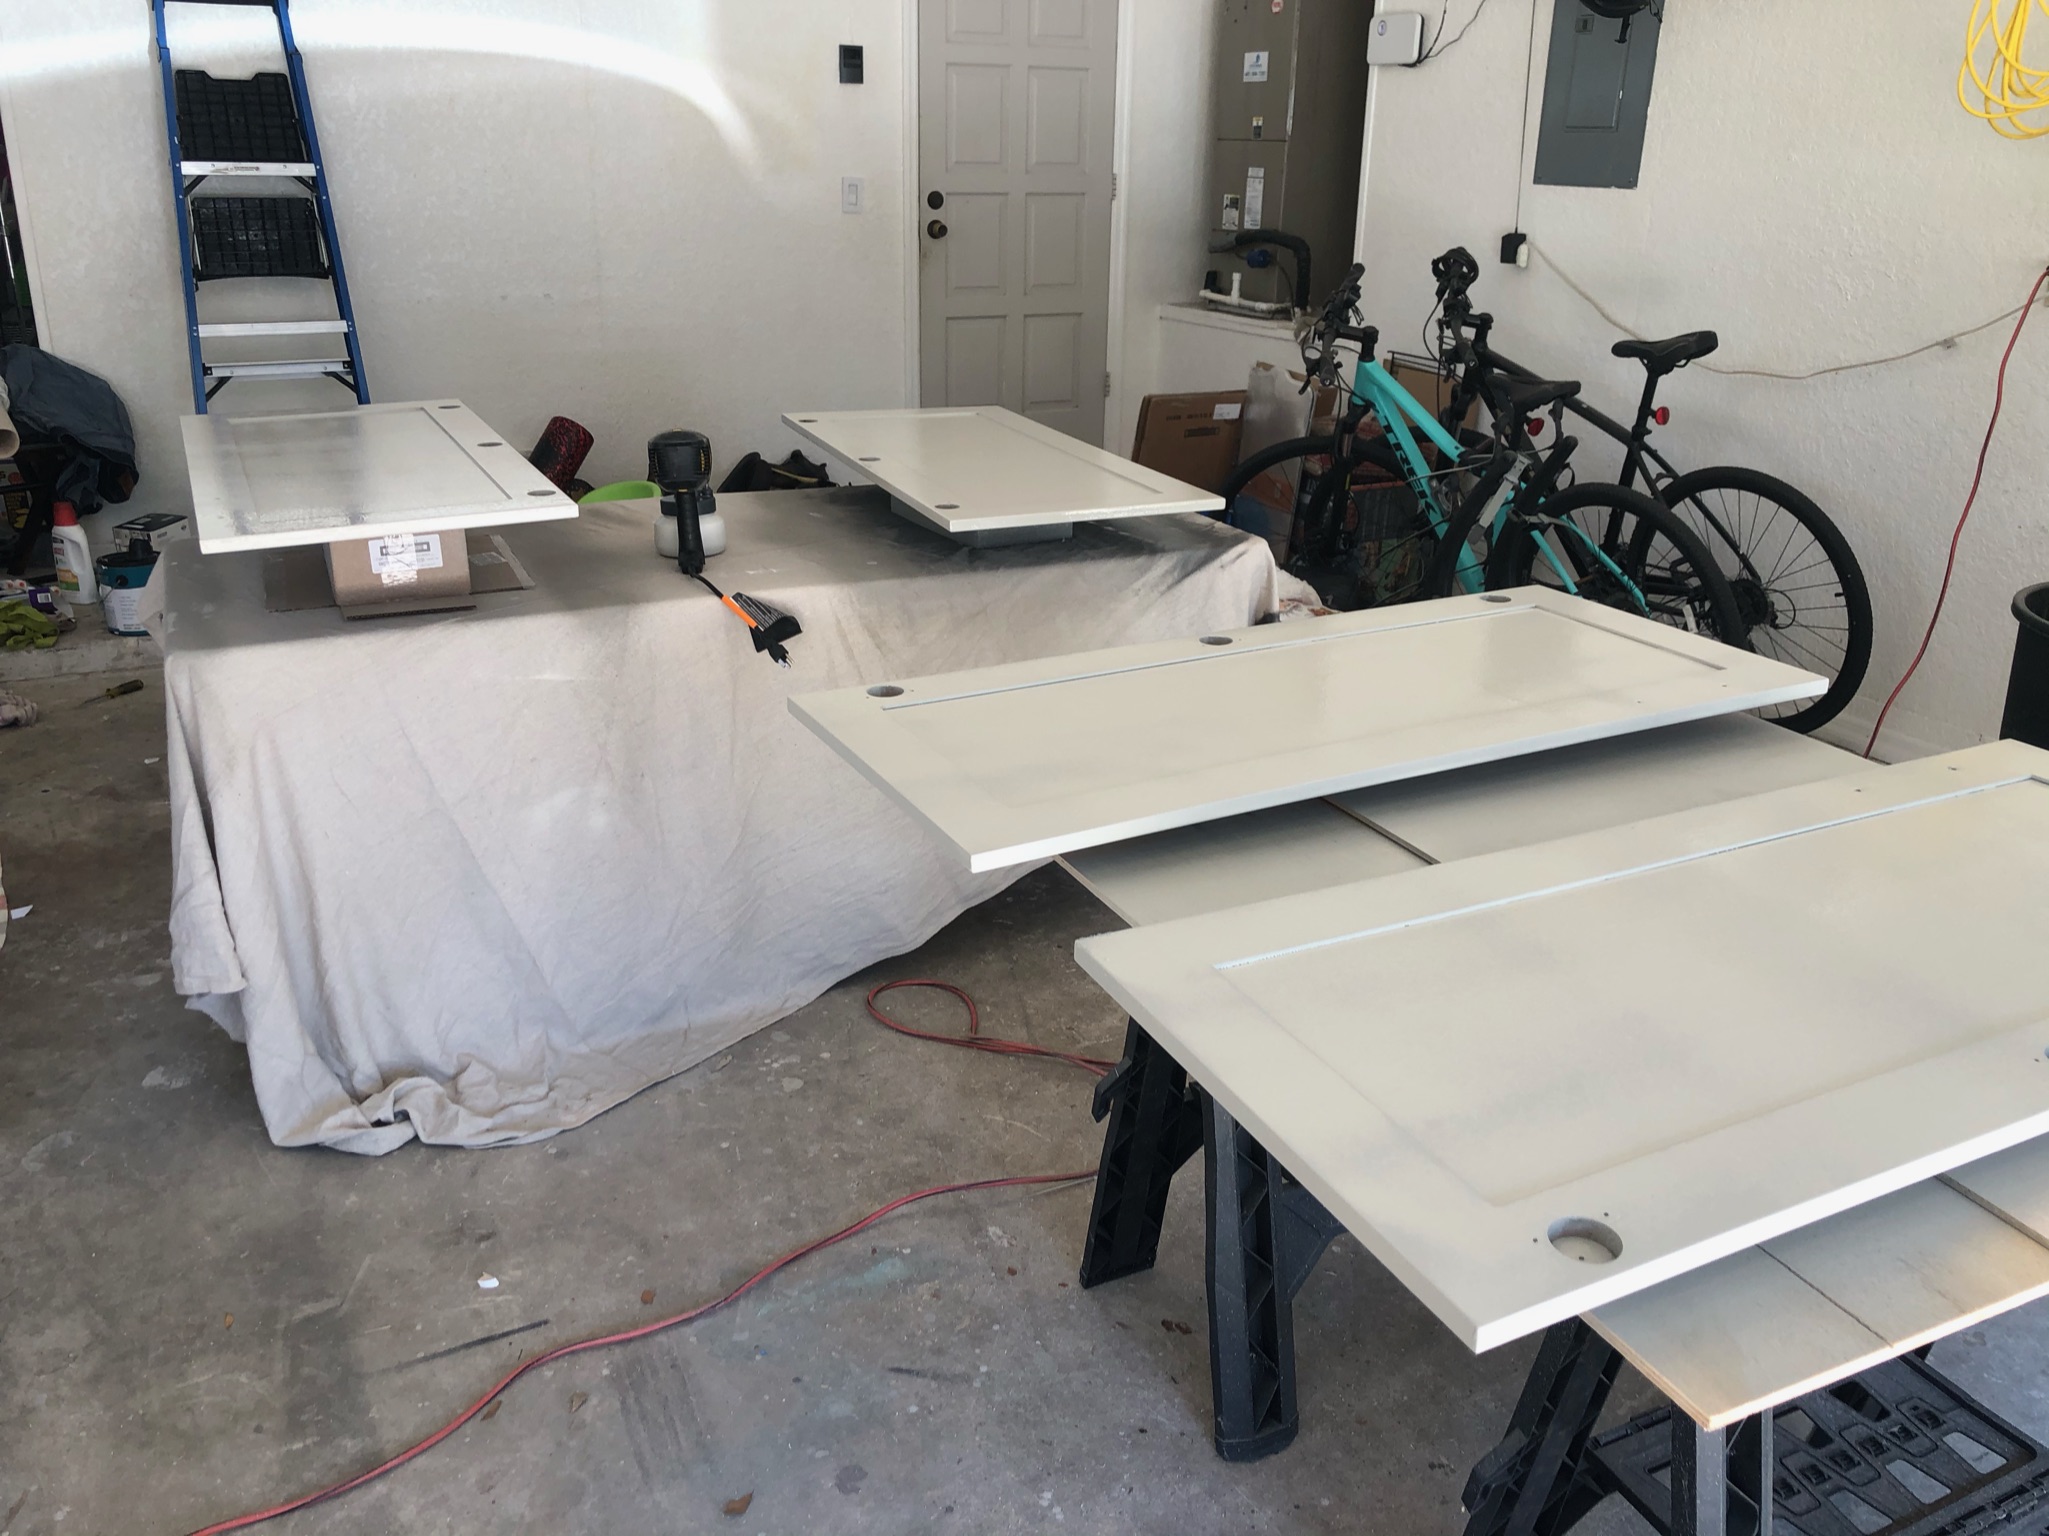
Next, you’re going to remove the cabinet doors by unscrewing the hinges from the frame, and then remove the hinges from the cabinet doors themselves. Set all hardware inside your cabinet box so you don’t lose them.
Wipe down your cabinet doors before sanding. I used a degreasing cleaning agent (some will use this in place of sanding but I did both steps) just to give it one good wipe down. Once it dries, you can start sanding down the cabinet doors and frames by using a sheet or orbital sander. For this step, it’s not necessary to sand the cabinets down to the bare wood; the goal is to create a rough enough surface for your primer to adhere to.
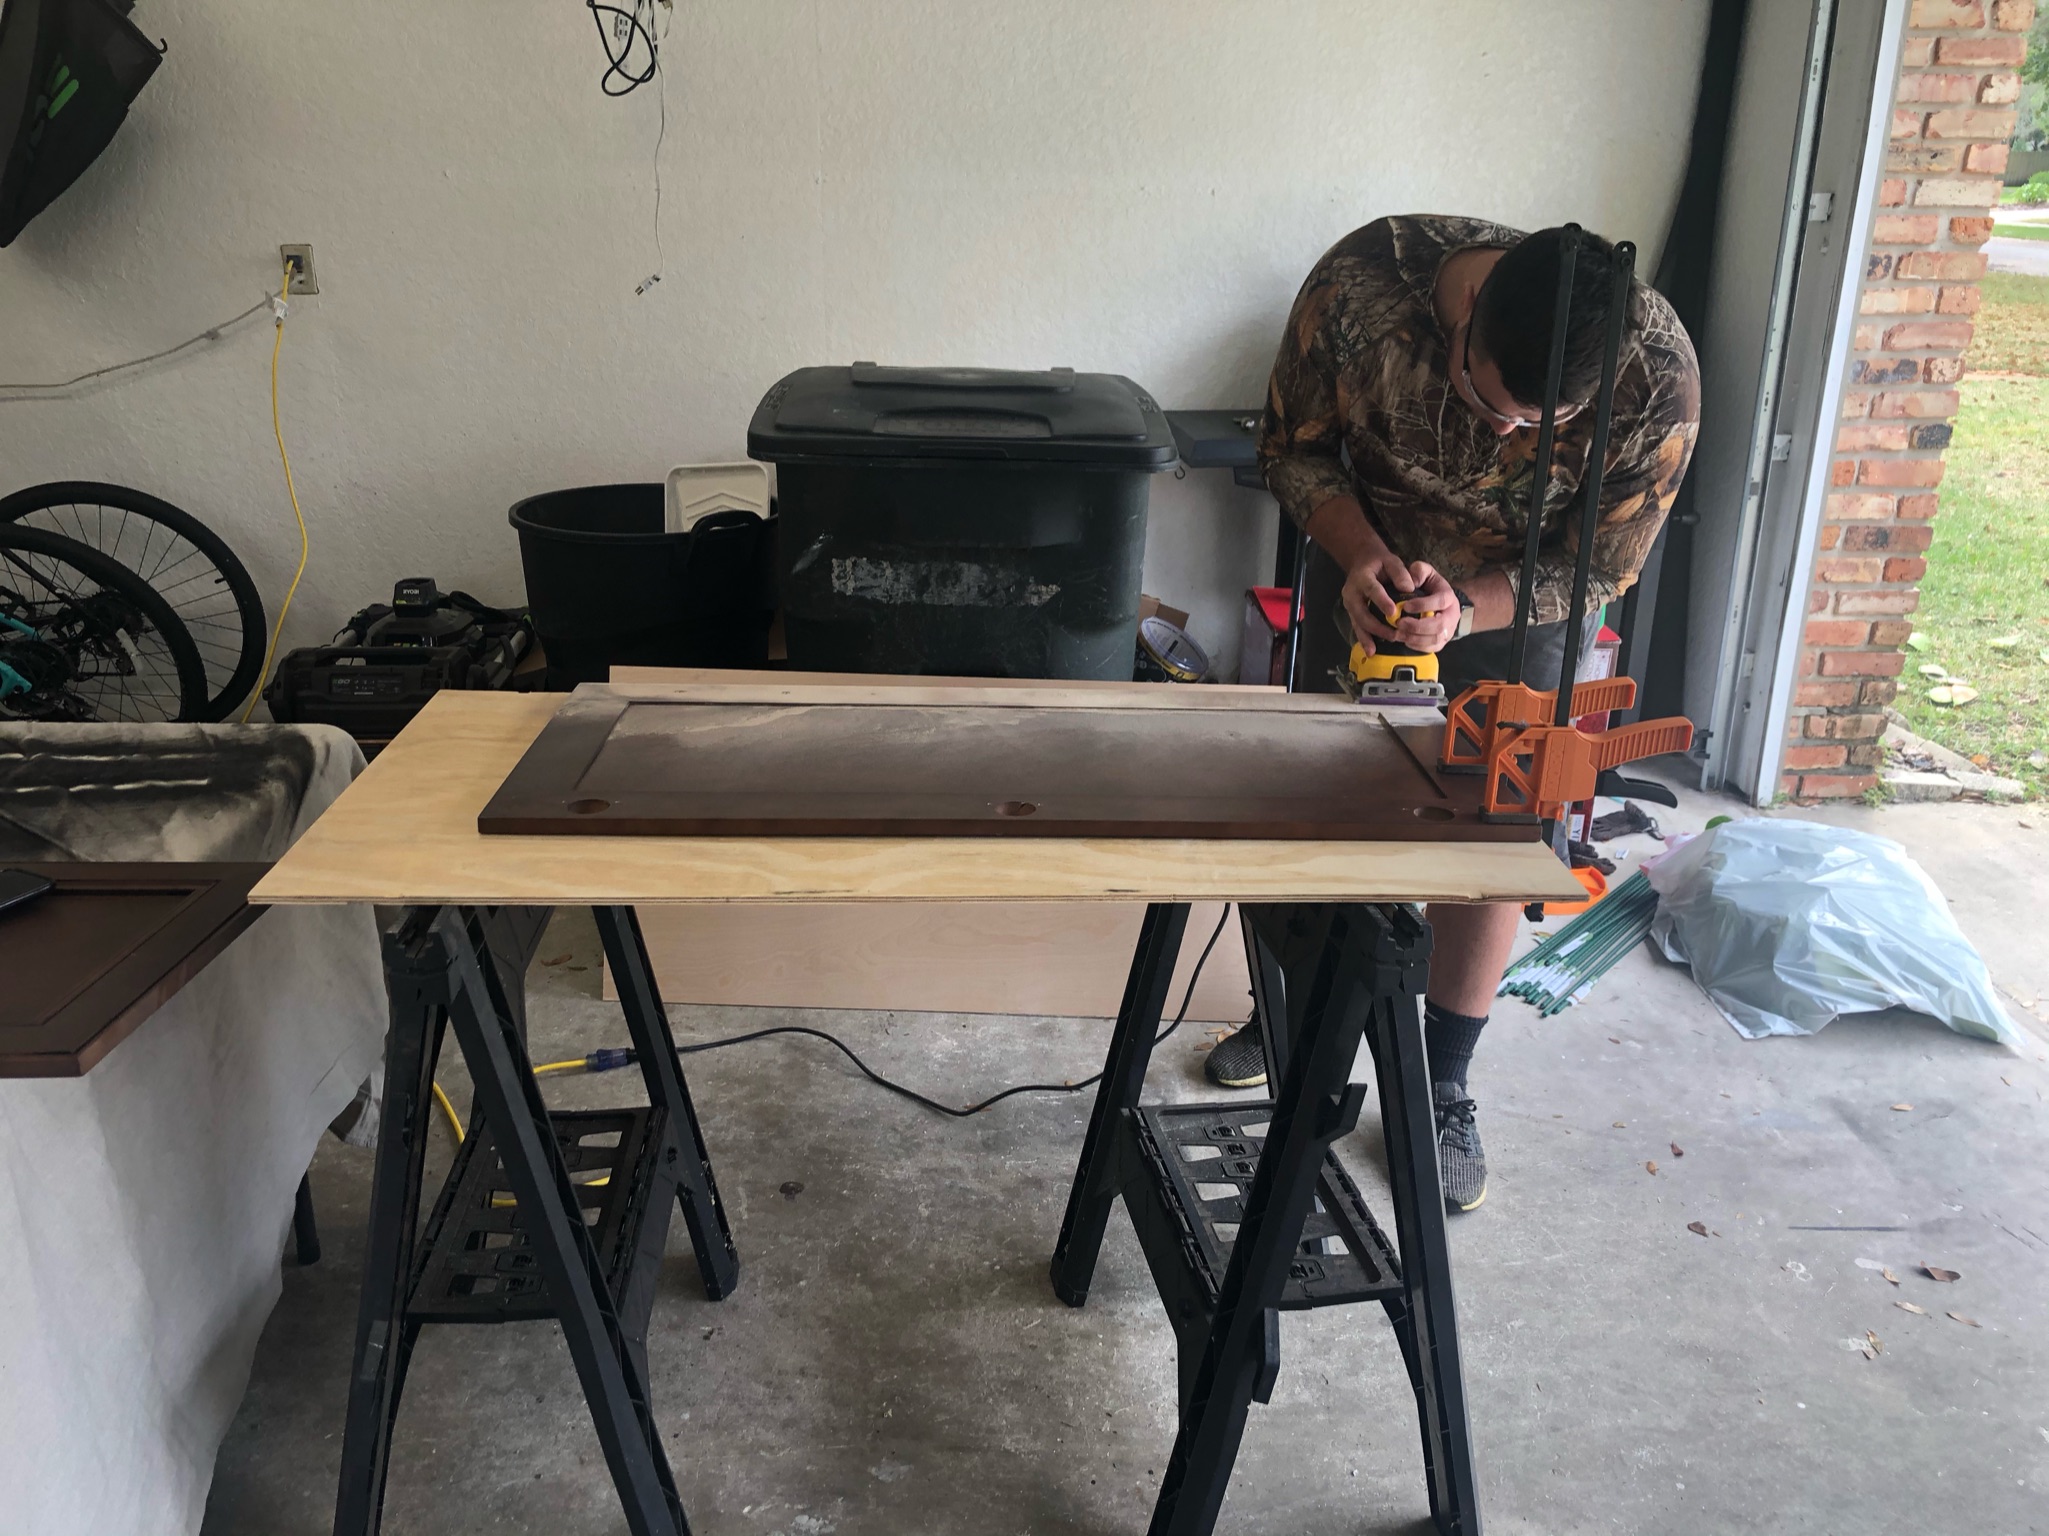
Use a tack cloth to wipe away any excess sawdust after sanding and then it’s ready to prime!
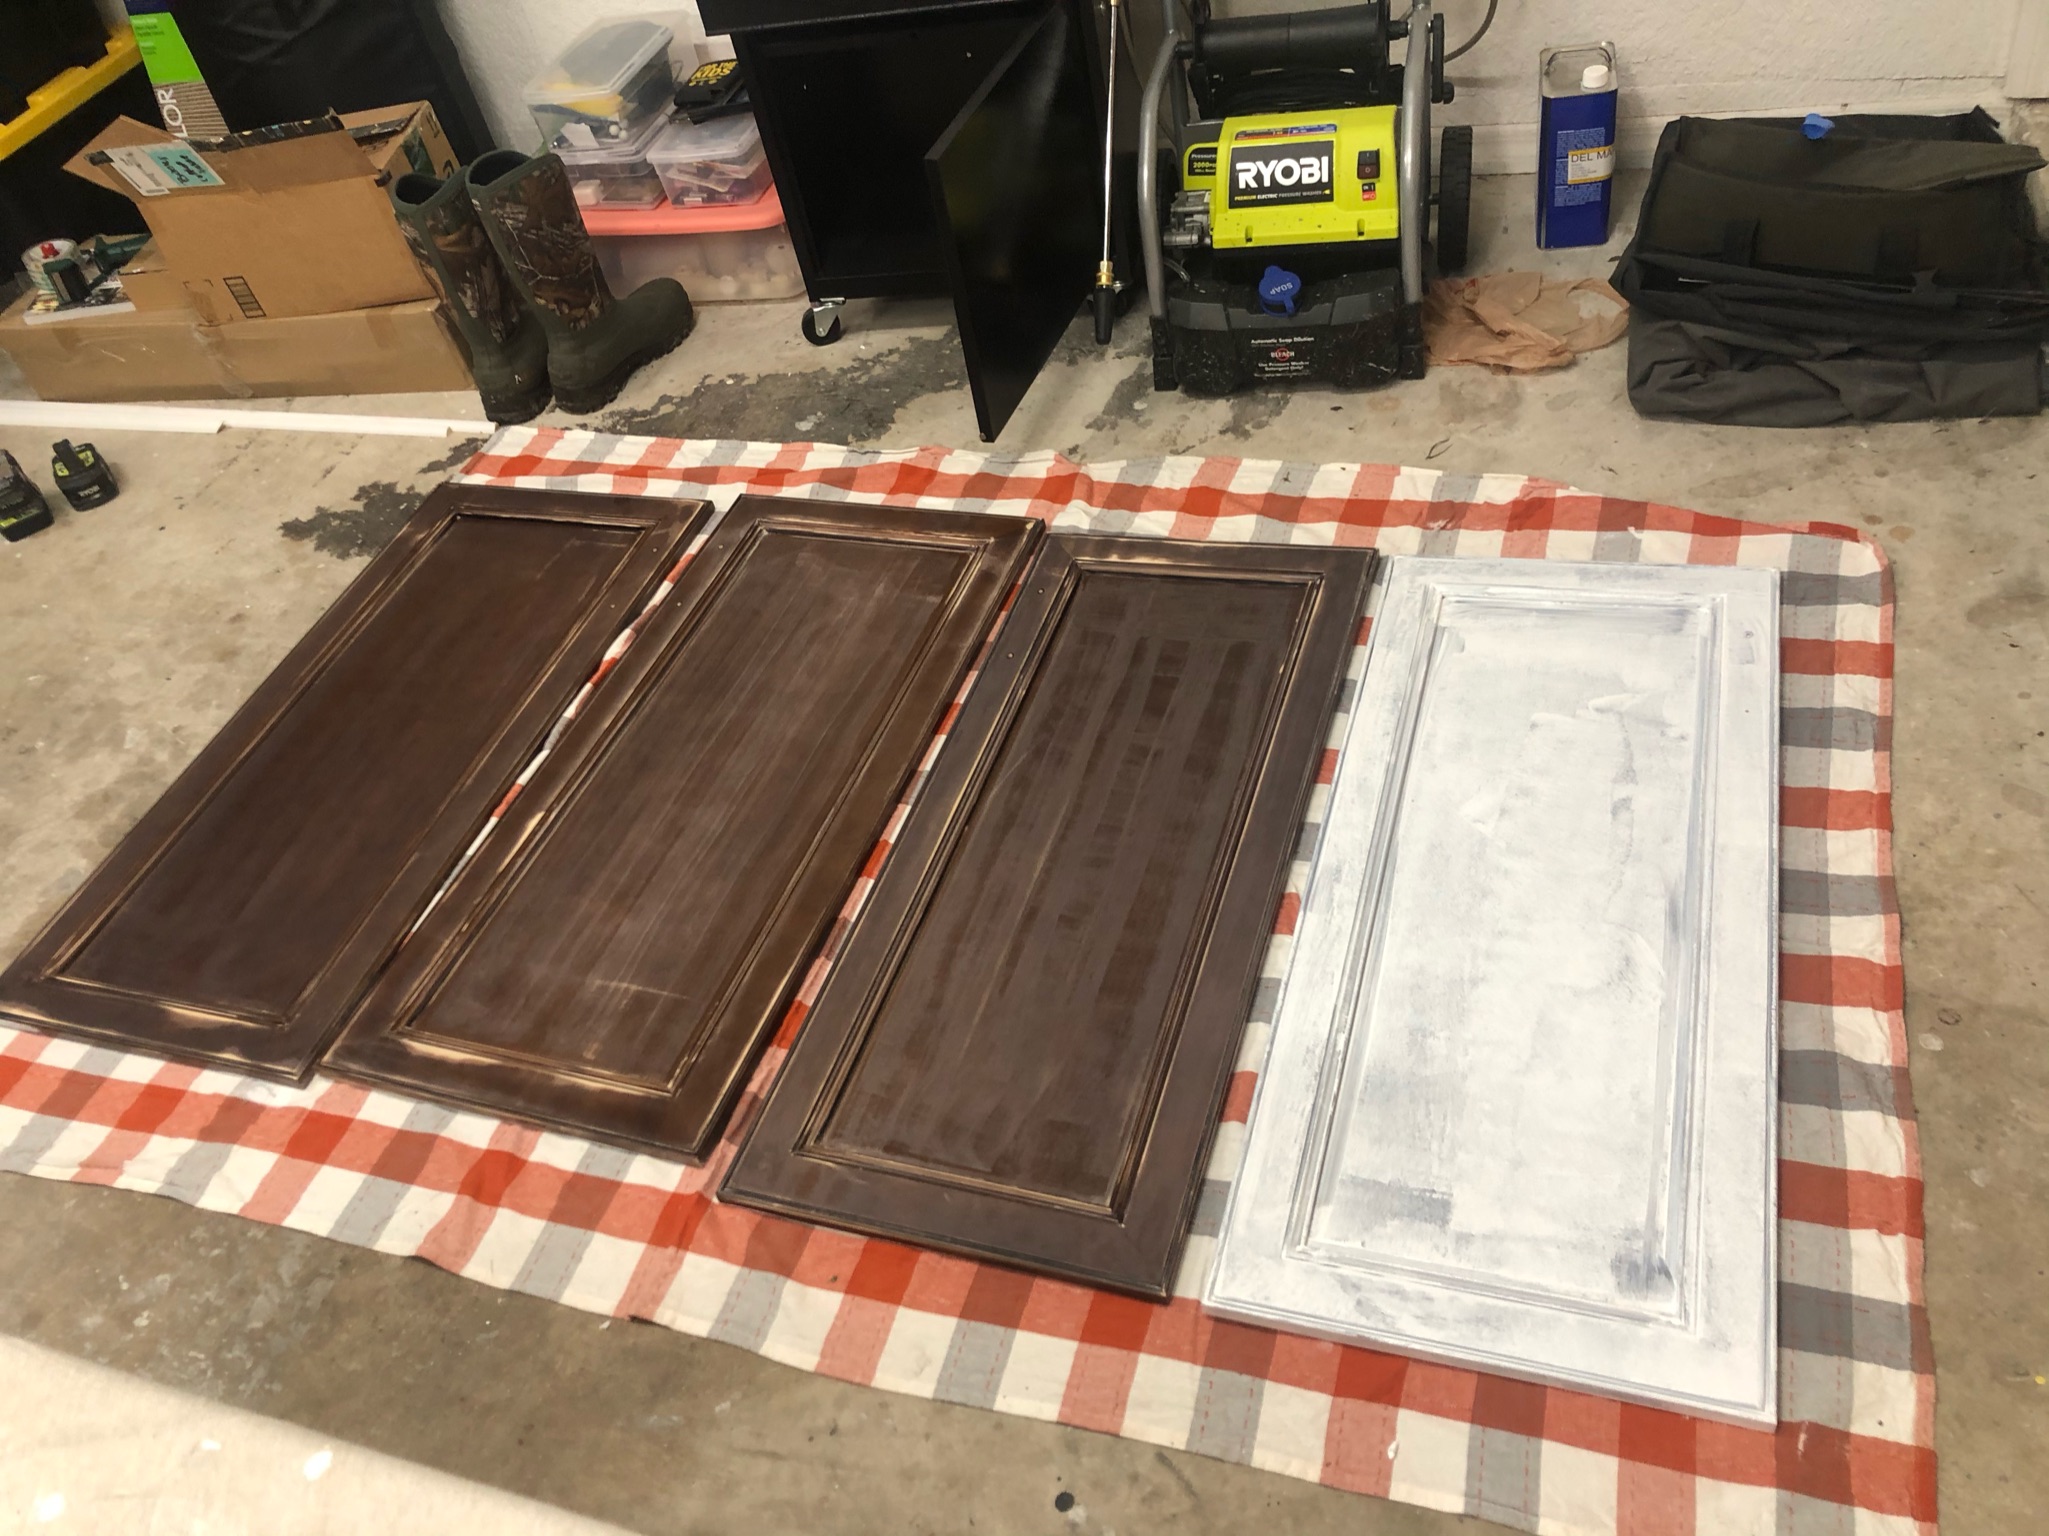
Priming
I used a small 4” paint roller for the larger surface areas and an angled brush to get into the more detailed spots. Once your first coat is dry, follow up with a light sanding using a 220 grit sanding block. This is just to remove any air bubbles or imperfections before layering on more paint. I’ll also note here that you do not need to paint INSIDE your cabinet boxes. No one ever sees them, and the wear and tear from every day usage will cause chipping. Do yourself a favor and just stick to the cabinet faces, drawers and frames instead. Like so

Painting
Now onto my favorite part of this project! You can technically use a paint roller for this but ain’t nobody got time for that. I invested in a small Wagner handheld sprayer (and actually, as I pulled this link I realized I bought a handheld spray stainer not painter L O L. Rookie. It still worked just fine though!). It was only $60 and I’m never painting with a roller again (cue Shia Labeouf’s ‘Just do it!!!’). And for someone with zero paint sprayer experience, it worked like a charm! Just point and shoot. Tip: always test spray a piece of scrap cardboard or inconspicuous area first to determine spray intensity level and angle. I elevated my doors horizontally when I painted, but I have seen others use small hooks and hangers to paint, which is brilliant. Either method works. Do what works best for your space.
I used Behr Cabinet and Enamel paint in the color Hot Stone (color matched from PPG). In between each coat, I highly recommend going over it with a 220 grit sanding block again. Tip: sanding in between coats is the key to getting a professional look. You can keep repeating this process until you’ve achieved the finish you’re going for. I did a total of three coats, with sanding in between each. I probably wouldn’t do more than that, though. Two coats may have been enough if I’d properly cleaned out my sprayer and it hadn’t splattered all over my cabinets.
With the cabinet paint I used, a top layer or sealant wasn’t necessary. But you certainly can go that route, especially if the cabinets are going to receive a lot of wear and tear, like in kitchens or shared bathrooms.
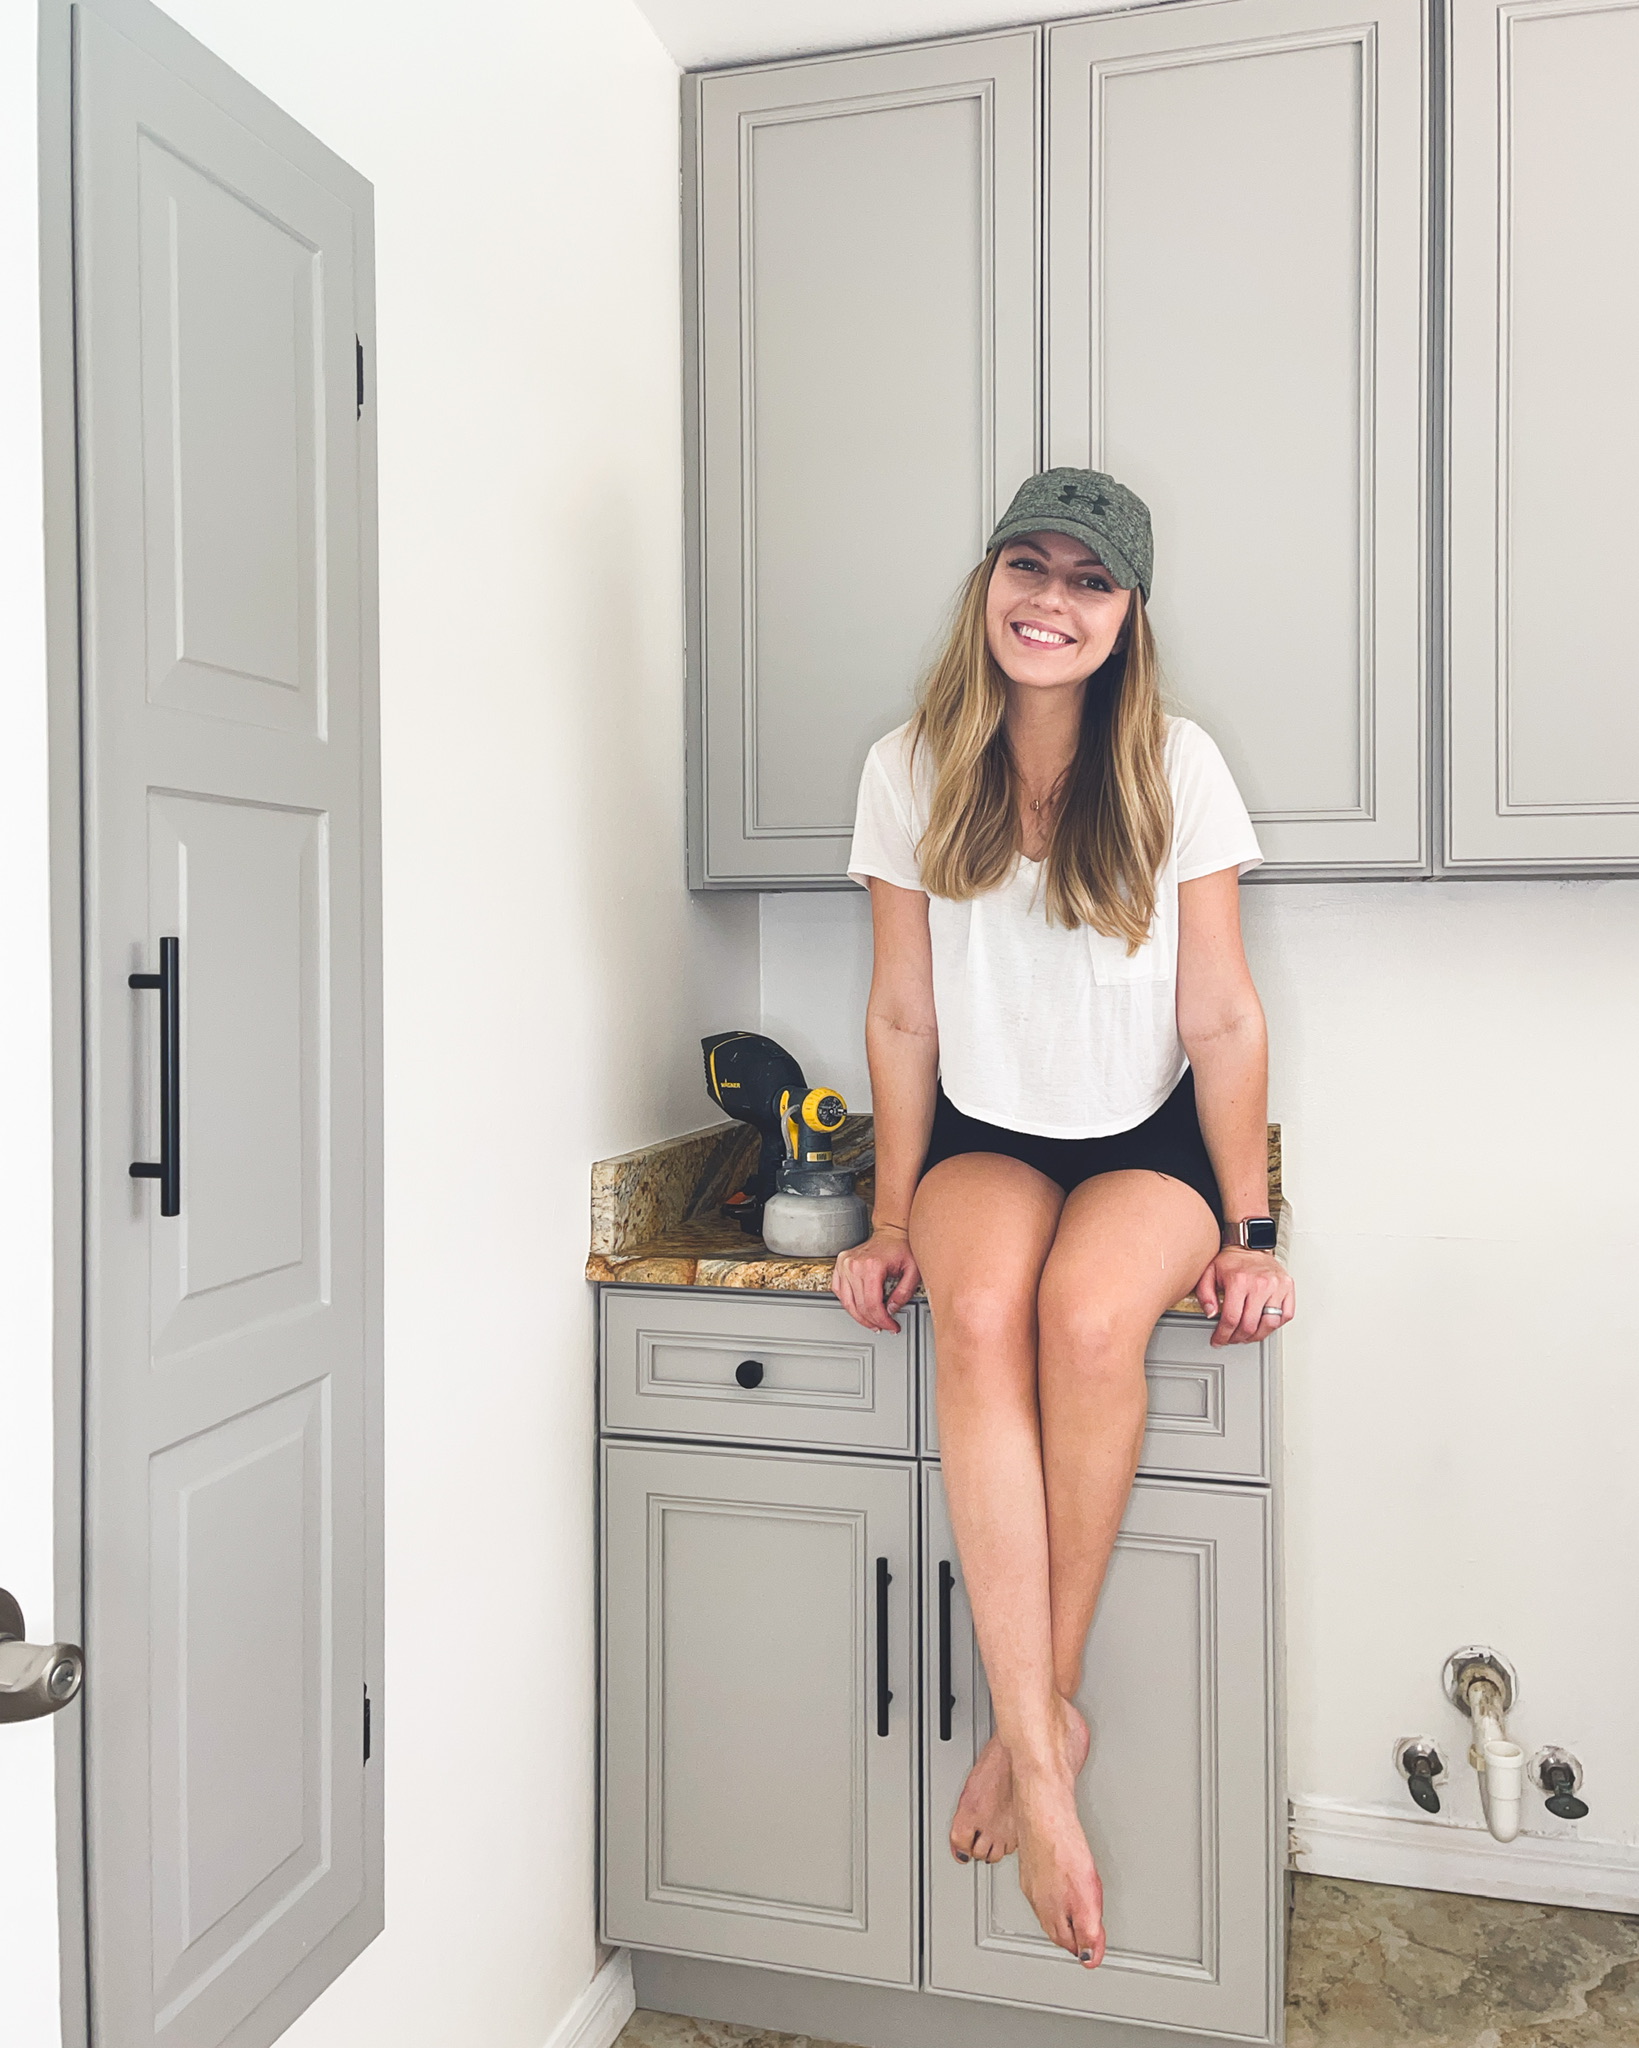
But that is pretty much it in a nutshell. Clean. Sand. Prime. Paint. See? ☺️ We hung our cabinet doors back up, installed new hardware, and that alone made the room look and feel a whole lot better.
It took me several weeks to complete overall but it was only a couple of hundred dollars out of pocket (versus the several thousand we spent having our kitchen cabinets professionally painted six months prior, geesh). This project was far less intimidating than originally anticipated and SO satisfying. I would recommend this as a beginnger’s DIY to anyone! What do you think of the after?


Just when I thought this project went off without a hitch, I decided at the last minute to repaint the small cupboard door, which is shown in its final state in the photos above on the left wall. And…well…that was a messy disaster, but a learning process nonetheless. I’ll share the details in a separate blog post on another day.
Thanks for reading! Let me know what you think in the comments.


Awesome stuff! Love this.
Excellent advice. Many good tips I wish I had known years ago when I was working on my first house.
Thats my Daughter! Love it!
Like father, like daughter!!!