
I always felt lucky to have had full creative reign with my bedroom decor growing up. And I mean TOTAL creative freedom. My bedroom went through many transformations as a child and teen. Starting with black and white polka dots and purple dinosaur valences, to a full-blown jungle-themed room, raw-hide coasters and all, and eventually making its way to this little slice of grape-purple heaven.

Purple was trendy then, don’t @ me.
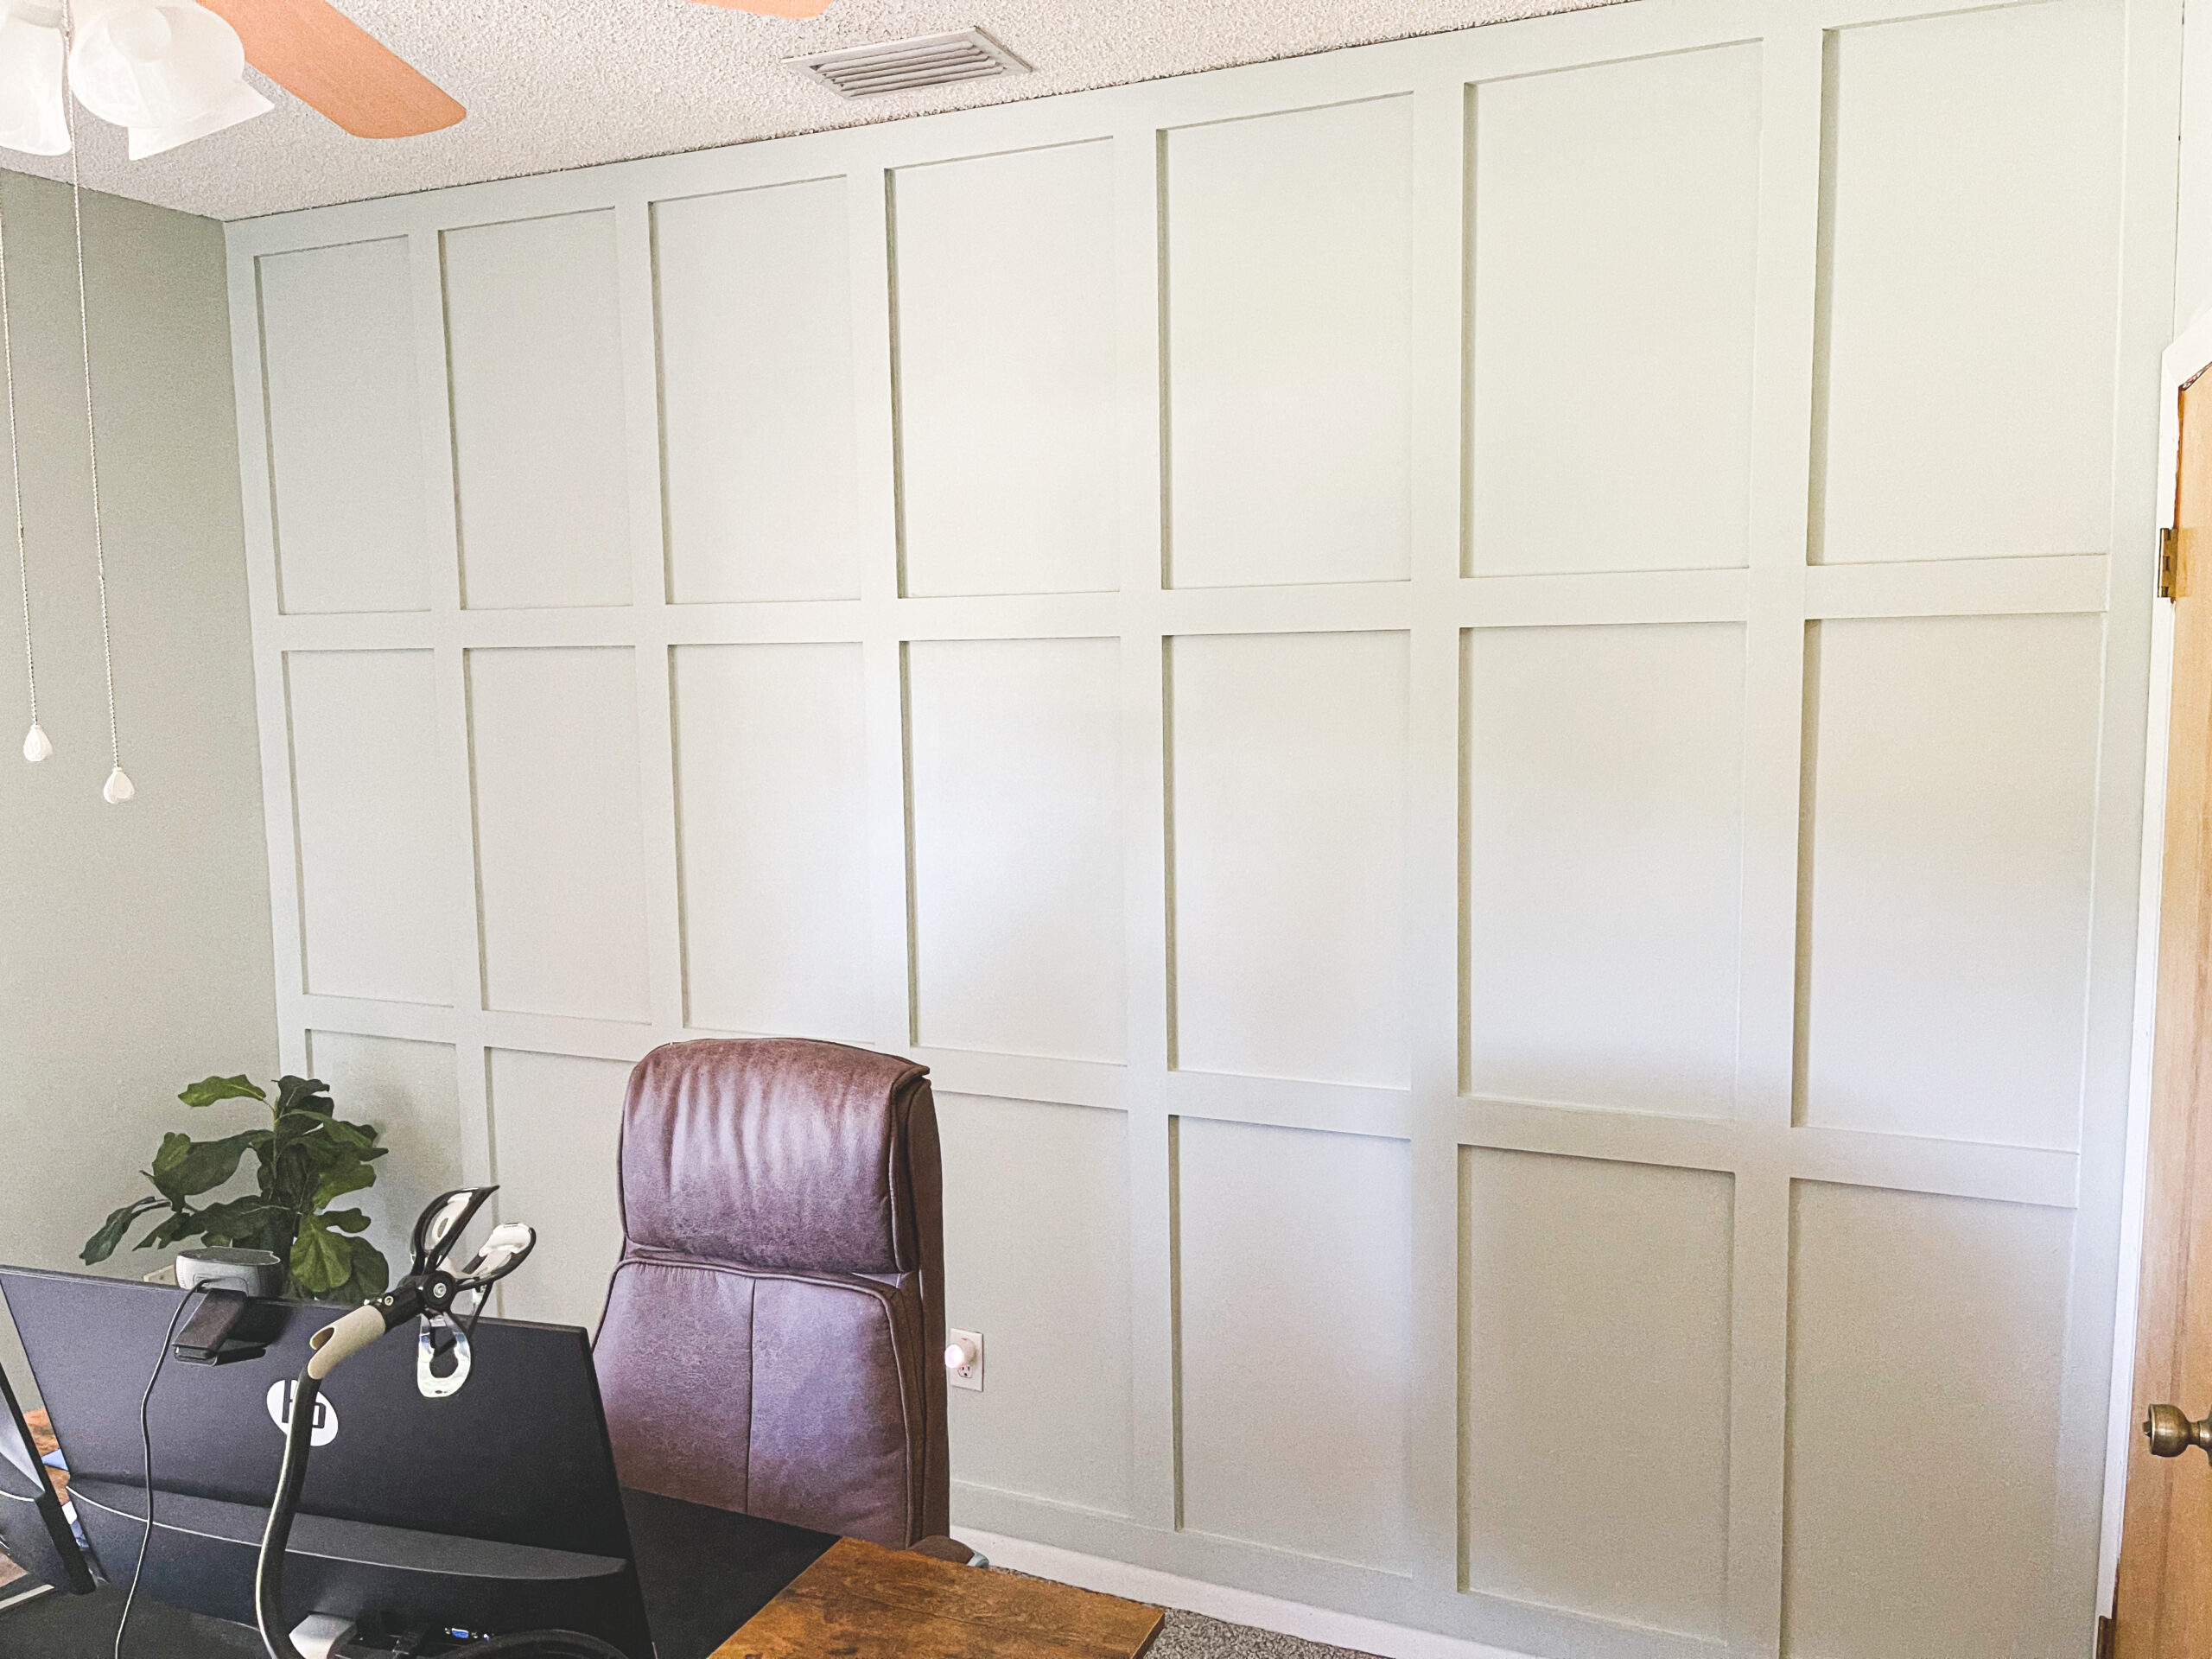
Fast forward more than a decade after moving out and my mom is now using this as her home office. Bless her.
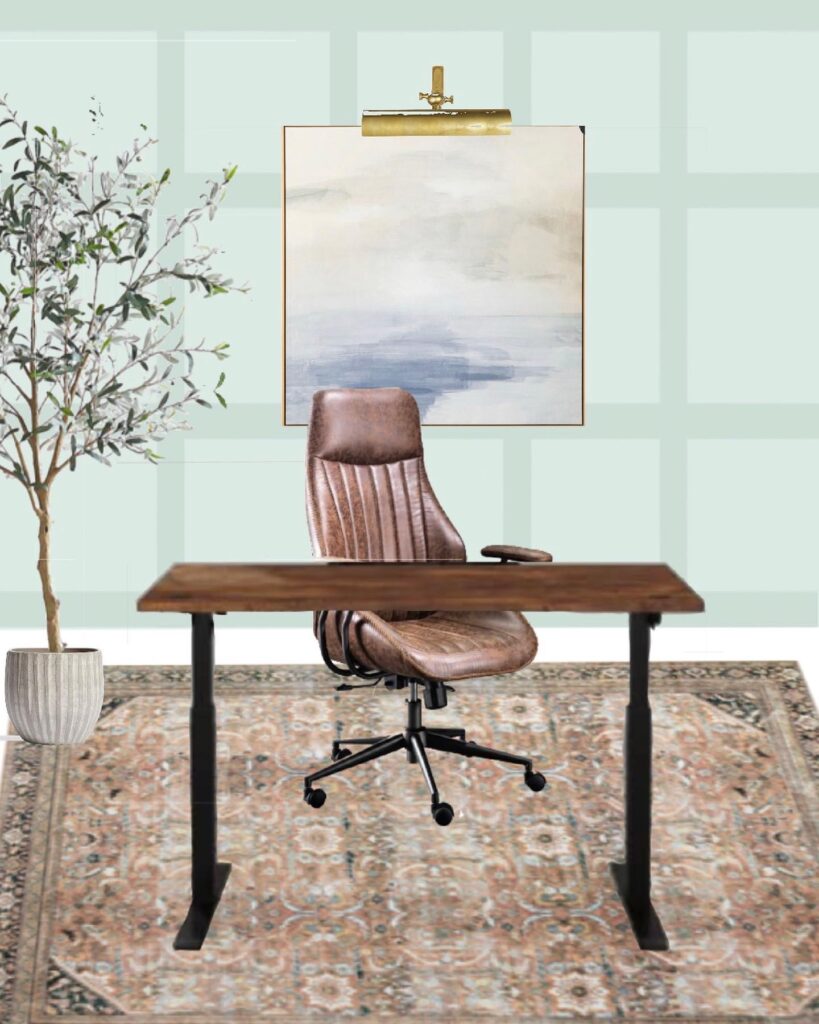
So, I decided it was time for a bit of an upgrade and gifted my mom a room makeover for Mother’s Day. Since she is now working from home full-time, it was time for this room to look and function like a professional home office. I wanted it to feel sophisticated and cozy, but not too cozy, with a bit of coastal influence. Here’s where I landed on the design.
The goal of this room transformation was to make the most impact with minimal expense. New paint and a board and batten wall treatment would easily accomplish this. If you’re looking for a really simple way to add interest to a room without cluttering your walls with frames and decorative Knick knacks, a wall treatment like board and batten, wainscoting, wallpaper or shiplap is the way to go.
My mom’s one “must have” for this room was to use the color Sea Salt by Sherwin Williams for the walls. As it worked out, this was the perfect color for a home office and really grounded the room. Plus, it made the task of selecting decor that much easier.
Now, onto the board and batten “how to”! That’s what we’re really here to discuss, right?
Here’s what you’ll need for this project:
Materials:
- 4’x8’ MDF
- Miter saw
- Wood filler/spackling
- Putty knife
- 220 grit sanding block
- Liquid nails
- Caulking
- Wood filler
- Level
- Brad nailer
Step 1: Do the math
This is hands down, the least enjoyable part of any project for me. Math is exactly why I chose to major in Public Relations instead of Business Administration. Only to eventually fall in love with my Marketing minor, which fell within the college of Business, and thus having to endure all the quantitative business, financial accounting, statistical probability of mathematical complicated-ness classes anyway. Ok, that last one I made up but you get the gist. Math + Meagan = No^2.
That said, here’s how I did the math for this project. Feel free to take it or leave it. I can’t say it’s foolproof but according to my very legitimate calculations, it should work 99.9% of the time.
Formula: Wall’s width measurement – (width of boards X how many boards you’d like to use)/how many columns you’d like.
So, in this instance, the wall was 143” wide. I wanted 7 boards, measured at 3” each, to create 8 columns. The formula would then be, 143 – (3×7)/8 = 17.5”. The final product of this equation is how many inches you’ll have in between each vertical board.
Step 2: Cut down the MDF
Next step was to start cutting down our MDF. A table saw is best for this because MDF is heavy and a 4×8 is hard to work with. We ripped the entire board into 3” wide x 8’ long panels. Pretty straightforward stuff. If you don’t own a table saw, that’s ok! Your local home improvement store should be able to rip these down for you before you leave – for $free.99!
Step 3: Frame your wall
When you’re doing an entire board and batten wall, it’s best to frame it out first because the frame will serve as your level guides for the remaining boards.
Start with the bottom board first and make sure it’s level. Draw your plumb line so you know where to line your board up. On the back side of your board that will be attached to the wall, apply a few dabs of liquid nails at the top, middle and bottom of the board. Then, slowly line your board up with your plumb line and stick to the wall. Keep your brad nailer within arm’s reach because while holding the board in place, you’ll want to insert your first nail in the middle of the board. Then continue nailing the board every few inches on either side until you get to the end of the wall.
Tip: Be careful not to place the nail too close to the top, bottom or end of the board because it could split the wood/MDF.
Once your bottom frame is in place, tackle the top frame next following the same process. Then, the left side frame. I chose not to close in the box at this point (imagine it looking like a sideways horseshoe), just in case my measurements were slightly off along the way and I’d have to adjust, which is exactly what happened… LOL. Do as I say not as I do, ok? Ok!
Step 4: Boards and battens
Starting from the left batten, measure 17” out from the right side of the board, draw your next plumb line, and then attach your next vertical batten following the same method as above. Keep repeating until you get to the end of the other wall. Tip: If you want to save some time, cut a scrap piece of wood down to 17” and use this as your template for spacing in between each batten. That way you don’t need to measure out 17” each time.
The final step in installing this wall treatment is to start cutting down individual 17” pieces of MDF to create your boxes. I chose to create two rows of boxes, but you can make as many or as few as you’d like. You can even opt to keep the wall as is with just vertical battens. Lots of creative flexibility here! If you used your 17” piece of scrap wood as a measuring guide for your verticals, this should be a piece of cake since everything should have the same exact measurement.
Step 5: Wood filler and caulking
In order to give your board and battens a seamless, built-in look, you’ll now want to go back and fill in any nail holes with wood filler. My favorite product for this is Plastic Wood by DAP because it goes on pink but dries white, so you know when it’s ready to sand. Then, use caulking to fill in any of the gaps or seams in between each board. If you’re really committed to the built-in look (which, you should be!), you should also caulk where the edge of the boards meet the wall. It seems tedious, but I assure you it will be worth it in the end because everything will be incredibly flush and seamless as if it was always meant to be that way.
Step 6: Sand and paint
Once all your wood filler dries, lightly sand it down using a 220-grit sanding block so that it’s completely smooth. Wait for your caulking to dry, and then paint away! That part is pretty self-explanatory. 😉

If you’re more a visual learner, I do have a highlight for this process saved to my Instagram page here.


Good information. I will keep this for future reference…have always wanted to do board and batten.