

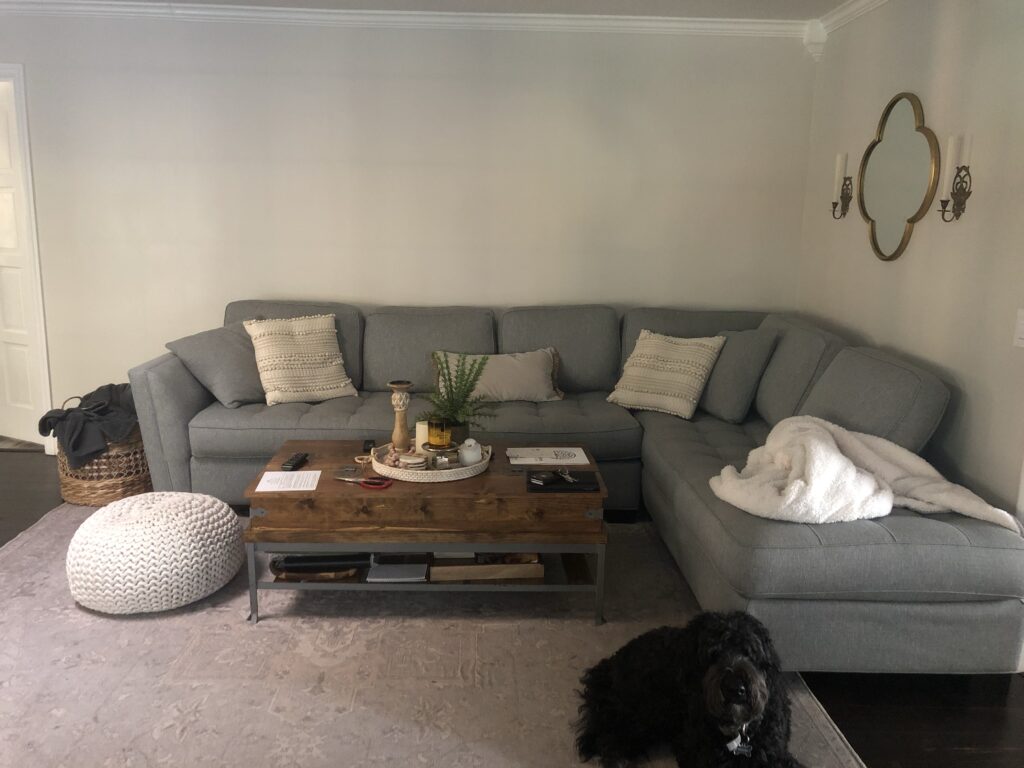
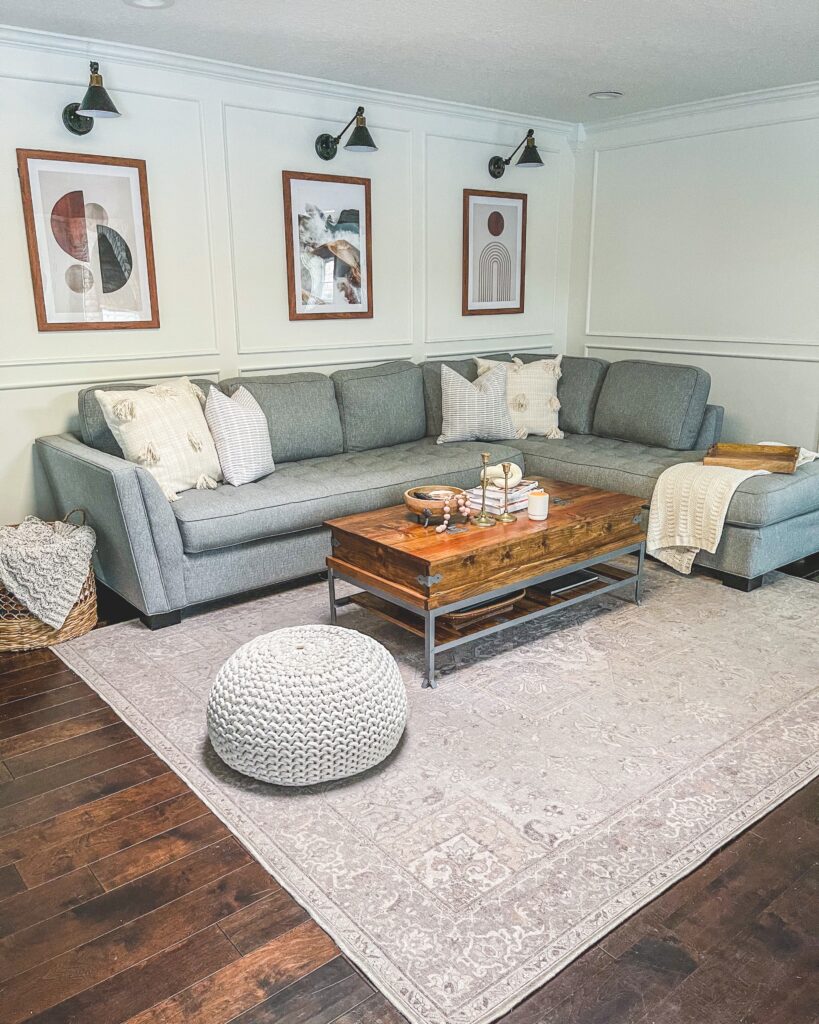
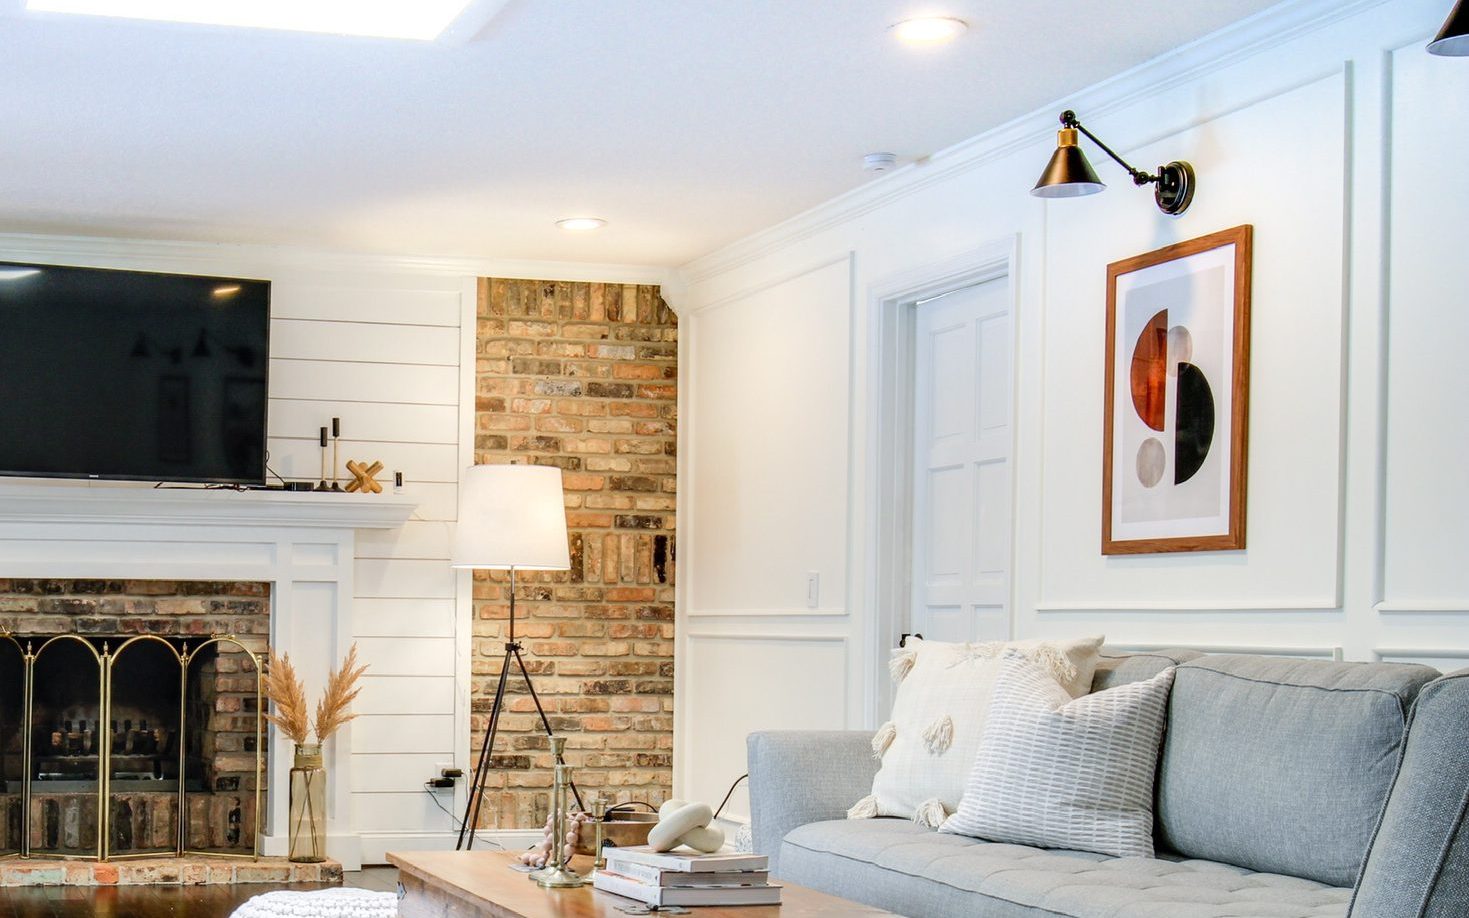
If you’re new around here, I’m a big fan of an easy wall treatment to bring dimension to a room. Don’t get me wrong, paint can make a big impact, too but sometimes it’s not quite enough to give you that cozy, depth you’re craving.
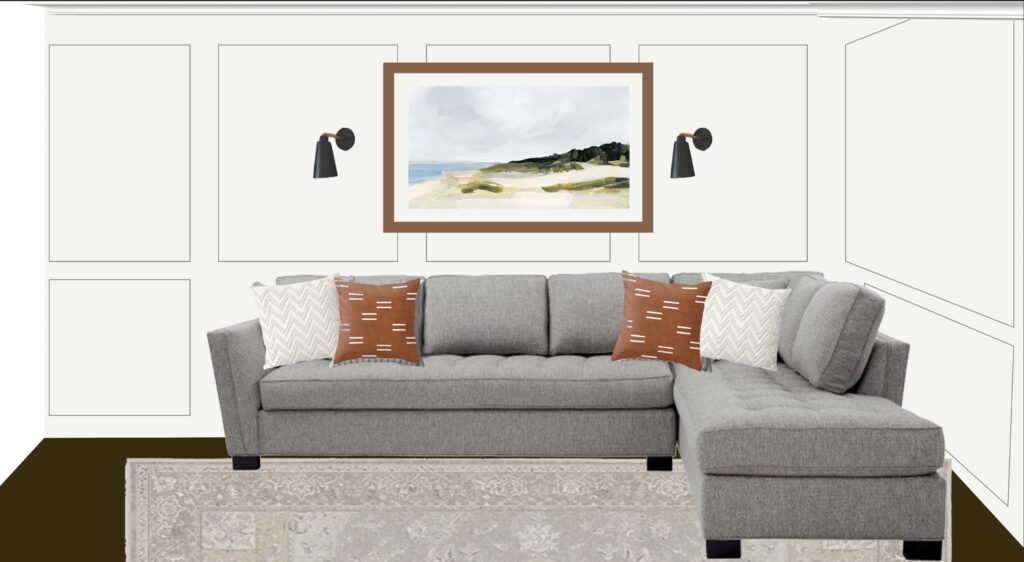
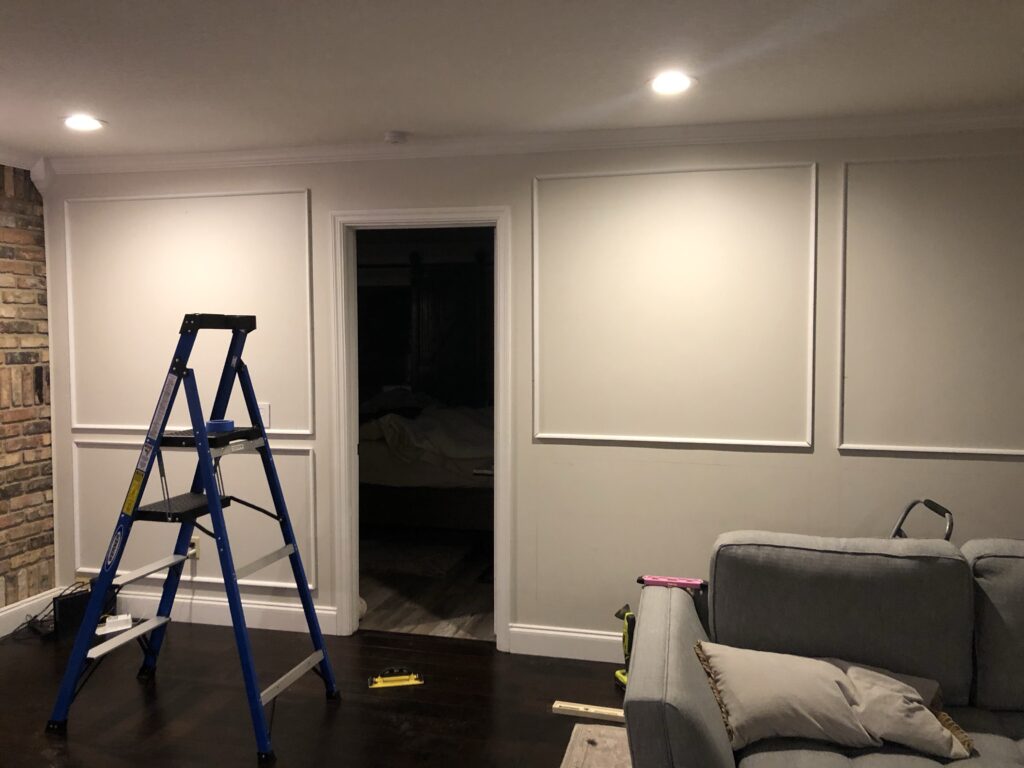
I’ve seen a lot of DIYers tackle wall molding in their homes, which is what originally inspired me to install it in mine. Jessi Interiors executes this beautifully in her home and incorporates a lot of traditional architectural elements in her designs that make my heart swoon. The Flip Hubb took a more modern approach to wall molding in her recent basement update and this is the route I chose to go with my living room. It uses quarter round for a more simplified version of wall molding (though, I’m going to be honest, I’m tempted to use traditional molding elsewhere in the home soon).
It’s all beautiful! And what’s even better is that it’s beautifully CHEAP! My living room project was close to $100 in materials and my entryway cost me a whopping $36. Now, granted, I already had a few things on hand like wood filler, caulking, sanding blocks, and tools. But even still, this is a very affordable wall treatment project.
Alright, fellow DIYers, it’s time to put together your wall molding toolkit! Here’s what you’ll need:
- Quarter round
- Brad nailer
- Level
- Wood filler
- Caulk
- Paint
- Miter saw / miter box
Step 1: Gather your supplies
The first step is to determine how much material you’ll need. The goal is to limit waste as much as possible, so I spend quite a bit of time crunching numbers after I’ve measured everything out before heading to the store.
For my boxes, I decided to keep them all two inches from the ceiling, and four inches in between each box. I was using primed pine quarter round, which was $0.69/linear foot, so to keep waste to a minimum, I measured out what I’d need and cut it down myself at Home Depot before checking out. Did you know you could do this? Tip: They’ll also rip down larger pieces of wood, like plywood or MDF for free if you’d like – just ask!
There are other types of quarter round, like PVC, which are charged by the 8’ piece, versus the foot, so it just depends on what your preference is. PVC also cuts like BUTTAHHH, by the way. Very easy to work with.
Step 2: Let’s get to cutting!
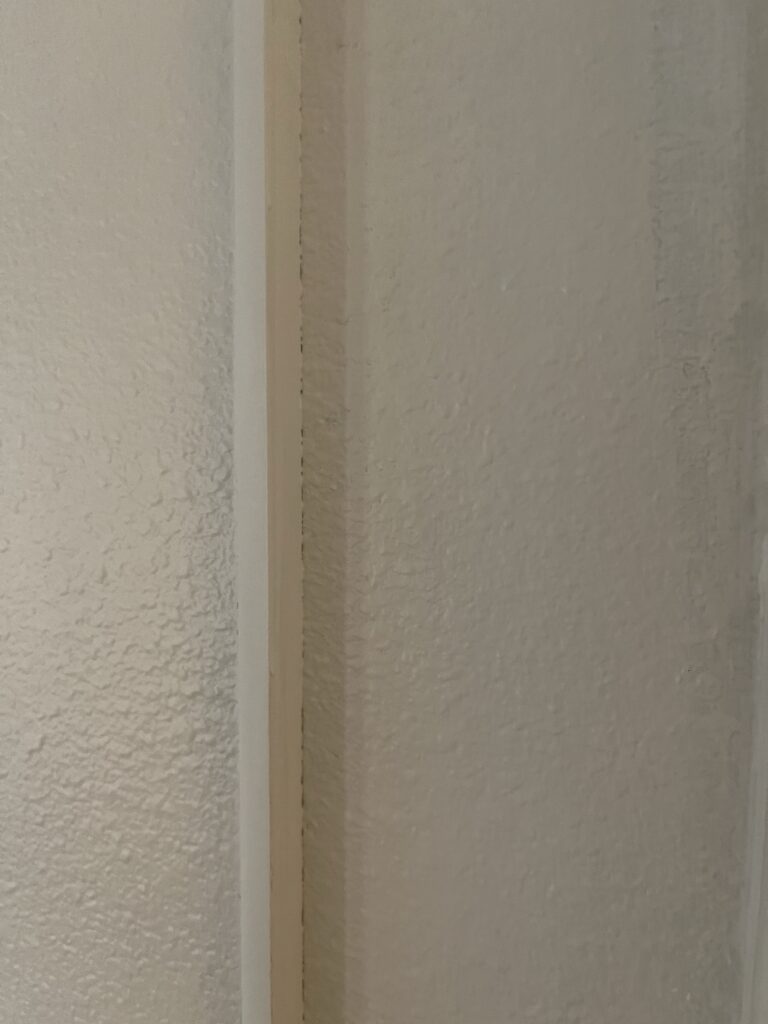
After lots of trial and error, my biggest piece of advice (and this is solely based on personal experience) is to cut your top and two side pieces at the same time and only cut the bottom piece once the first three are installed on the wall to ensure you get the measurement just perfect. Imagine this looking like an upside down horseshoe.
I have found that despite my best efforts to make every piece perfectly level, when you nail the wood into the wall it can shift ever so slightly. And this can either create gaps or overlap with the final piece that closes in the box, forcing you to run back and forth to the saw until you have it sized perfectly.
All that said, the upside-down-horseshoe method worked out perfectly for me in my entryway. I zipped through this install with literally no issues at all.
When it comes to actually cutting down your quarter round, I always say measure twice, cuss once. Seriously. Measure, measure, measure, BEFORE you make your cut so that you’re not wasting any material and having to re-do it. You can use a miter saw or miter box to make your 45-degree cuts. Fun fact: when I first started DIYing, I was so nervous to use a miter saw so all we had was a hand saw and miter box, and it worked out just fine. I also burned way more calories cutting these all by hand. LOL
Step 3: Nailed it!
There is nothing more empowering than taking my Brad nailer to my wall. Once you have your first three pieces of quarter round cut, and your level plumb line drawn on the wall, you’ll start by nailing in your top piece of quarter round FIRST.
I always start with the first nail in the middle. It will anchor it to the wall but still allow you to flex the right and left sides as you go to make sure it is perfectly level. As I work the nails out to the right and left, I hold a level above the quarter round as I’m nailing to keep everything straight. Repeat for both the right and left side pieces, and then finally your bottom piece to close in the box.
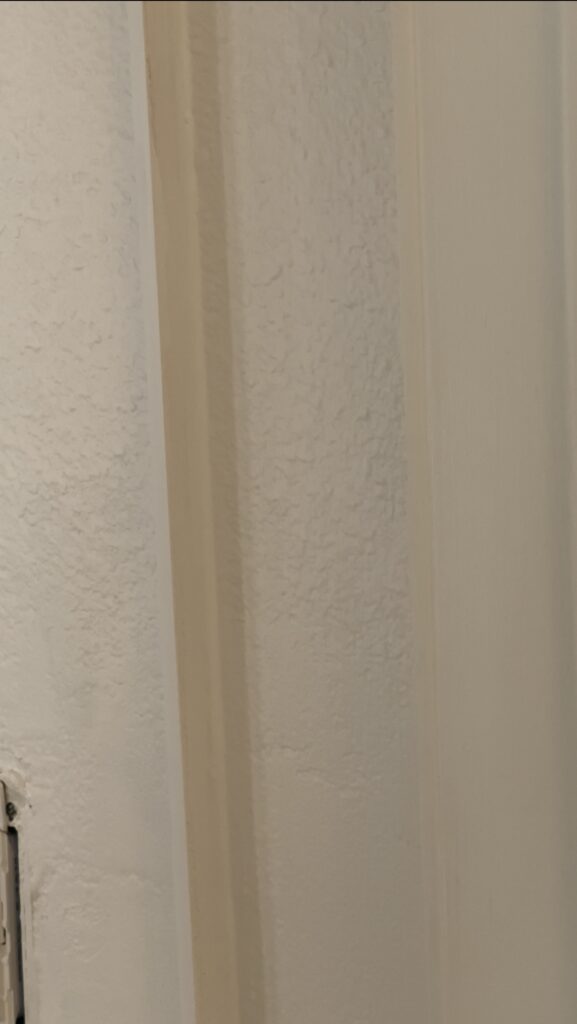
Step 4: Filling nail holes and Caulking seams
This feels like the dirtiest section with that title, doesn’t it? But that’s what we’re doing! Filling nail holes and caulking any gaps or seams to make this look completely flush and built-in. It’s like magic!
I use DryDex wood filler. It goes on pink and dries white so that you know when it’s ready to be sanded. Once it’s dry, sand it down with a 220-grit sanding block or paper and you can paint right over it.
You’ll also want to caulk any gaps between mitered corners, as well as where the quarter round meets the wall. This might seem tedious and unnecessary but I assure you it is not. It will create a seamless line so that when you paint, it looks like a custom build-in. Without it, your paint will clump in between the seems of the quarter round and the wall and will look cheap. Sorry, I said it.
Step 5: Paint!
Seriously, that is it. Wall molding in five steps with paint as the finishing touch.
Have you given wall molding or any wall treatment a go? What tips do you have? I’d love to hear them!


Great look and you nailed it! No pun intended…you explain things well! Impressed with the results. Looks very professional.
1
[…] If you’re looking for a wall molding or board and batten tutorial, I’ve got you covered here and […]